How to: Mystikeys 101
Mystikeys
Supply crates containing essential goods await across Kryphos City. Each sealed crate requires a MystiKey to open. MystiKeys aren't sold—they're earned through contributions: promoting Kryphos on social media, volunteering, joining community projects, and participating in organized events.
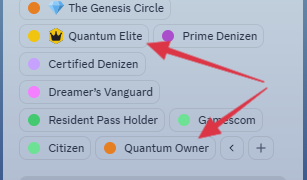
1. Discord - Required Roles
To be eligible for the Tweet to Earn feature, you must be a Quantum Owner or Quantum Elite!
2. Home - Login to the plattform
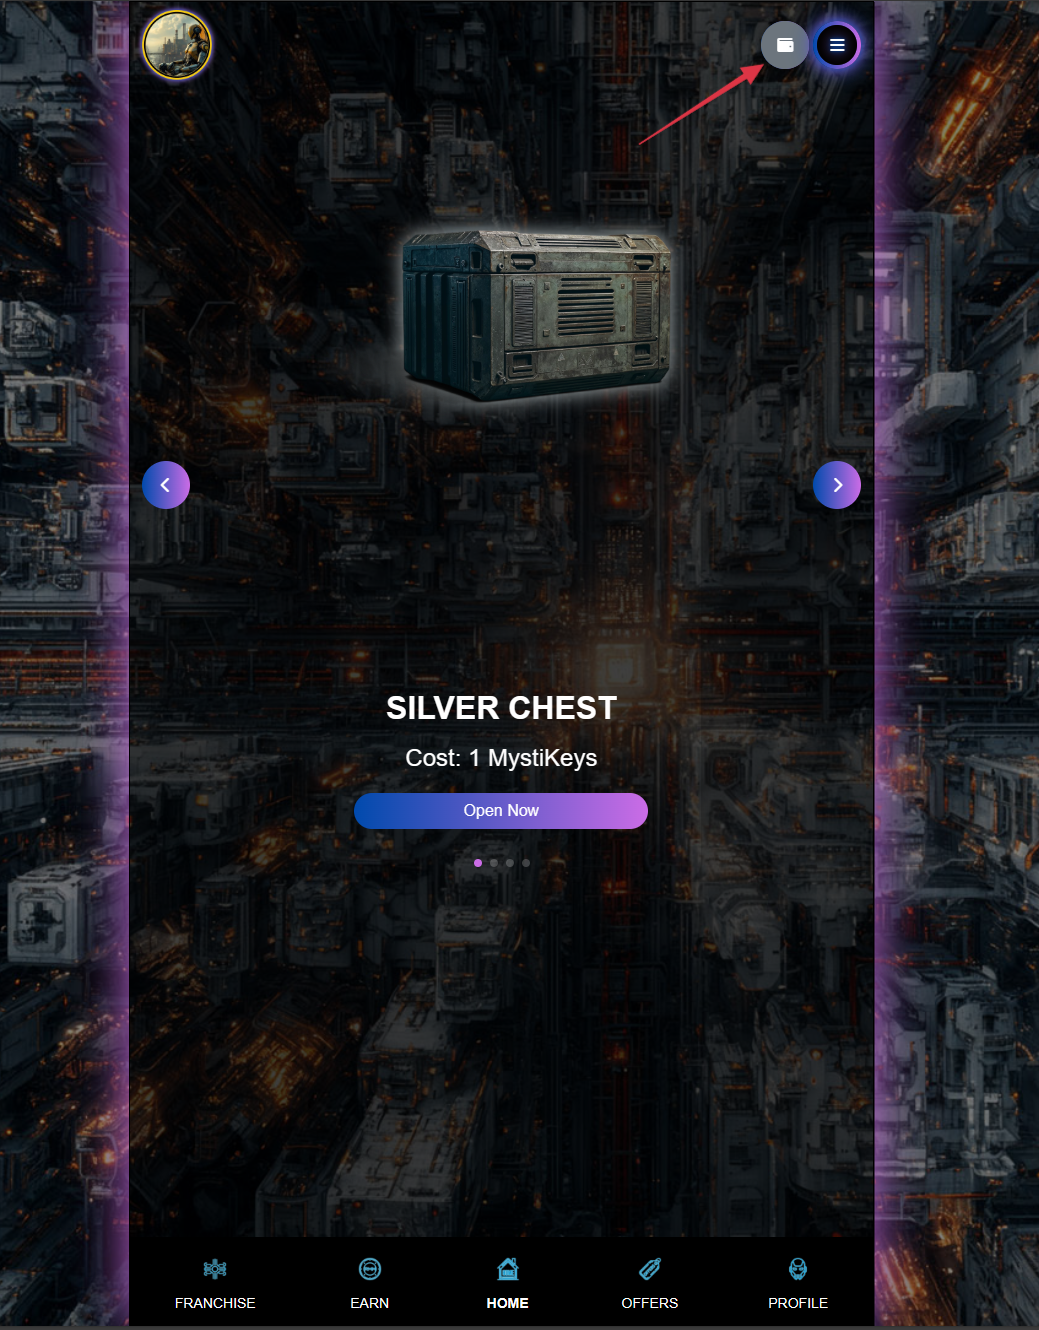
You have to sign in to begin.
Press the wallet icon on the top right.
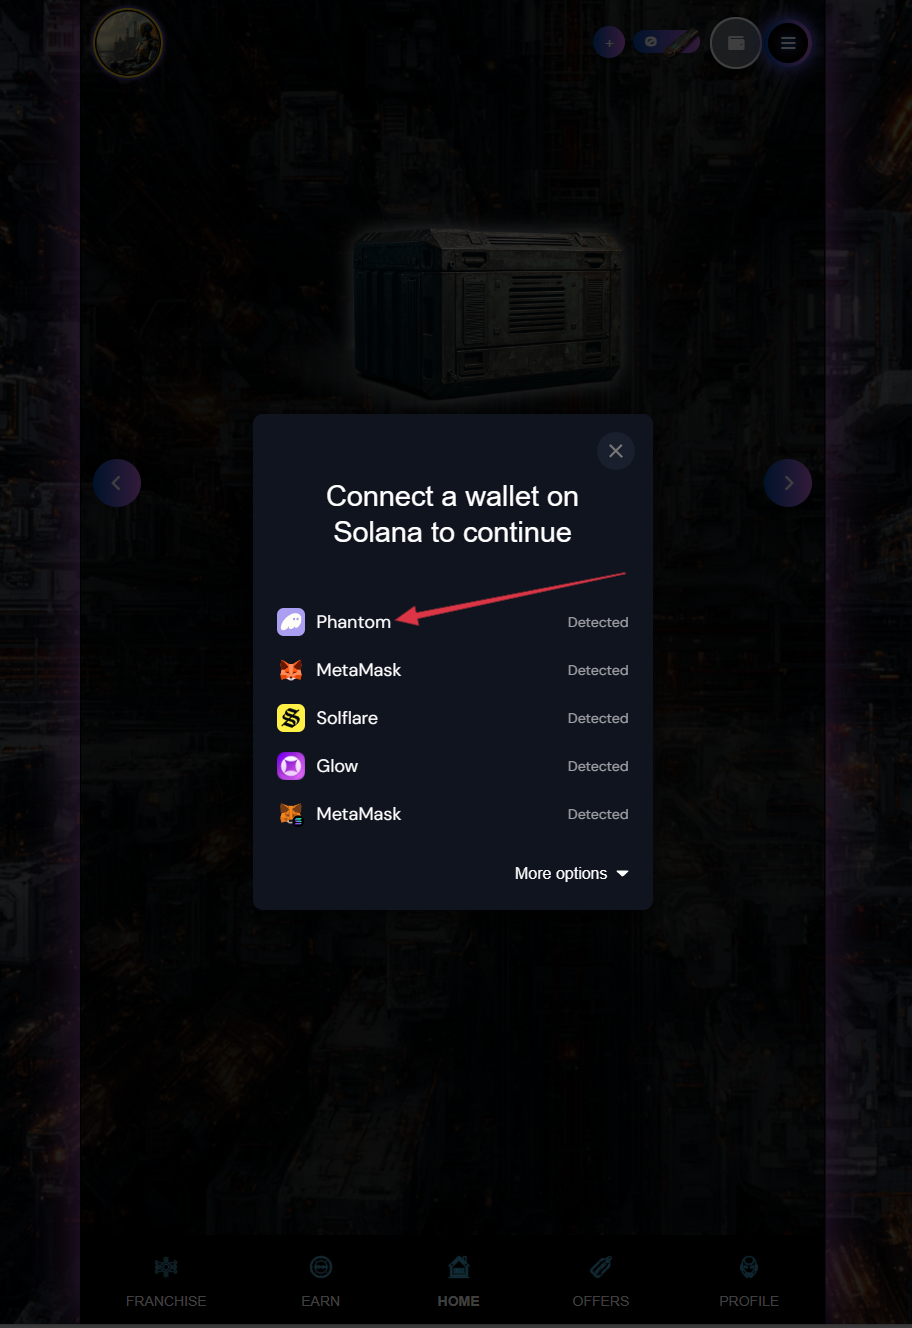
2.1. Select the Wallet
Select your preferred wallet. We use Phantom in this example.
3. Sign into your wallet.
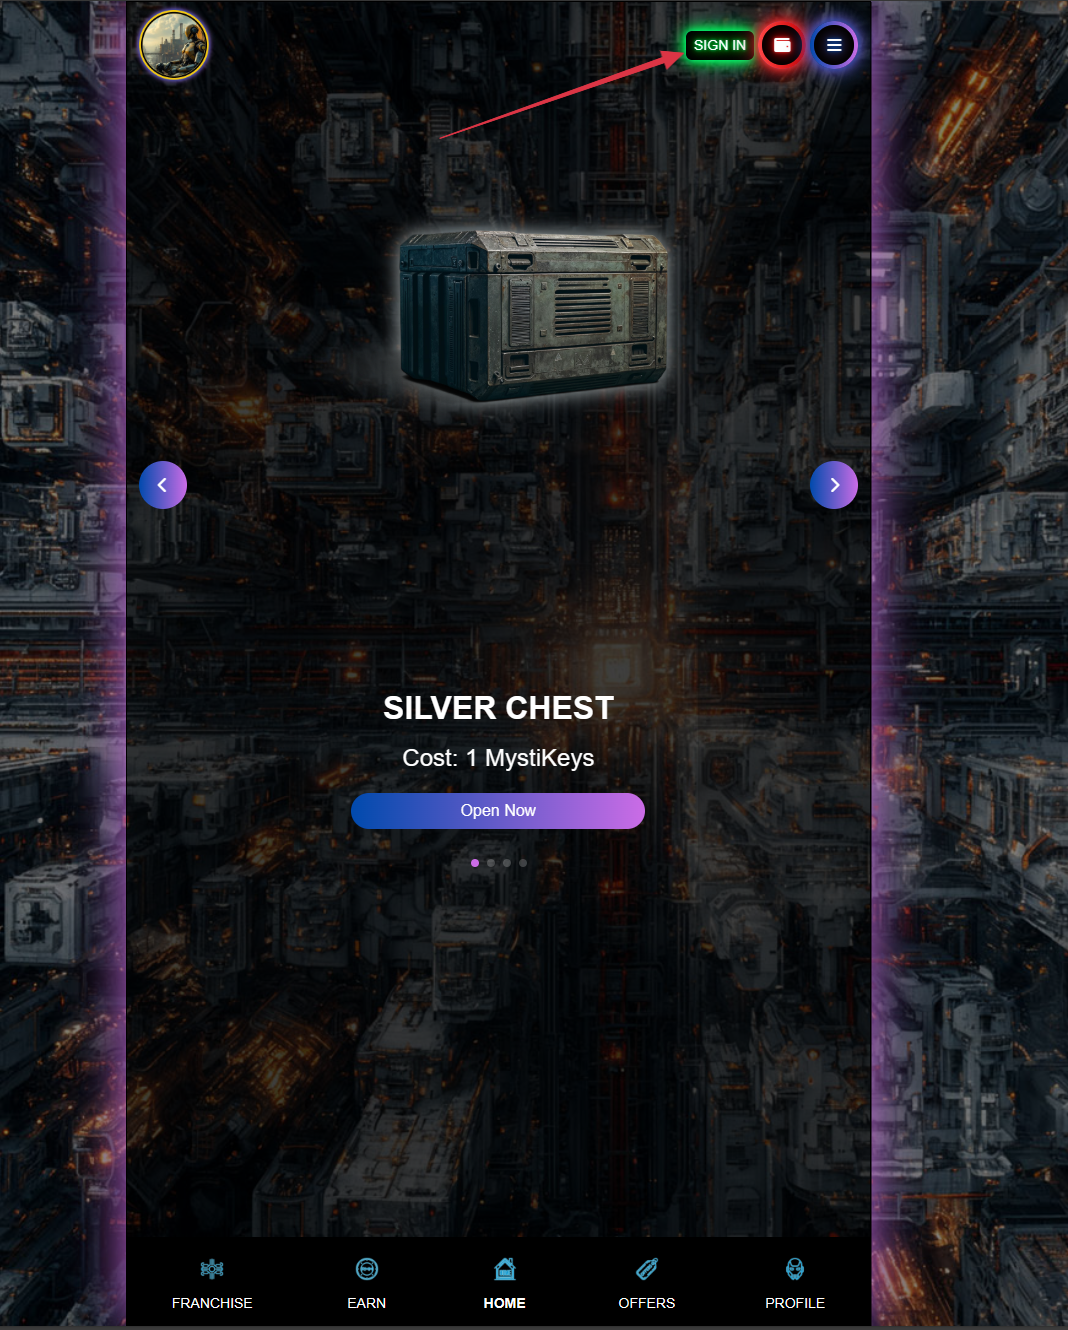
After selecting the wallet provider, you see a green "Sign in" button on the top right.
3.1. Sign the message
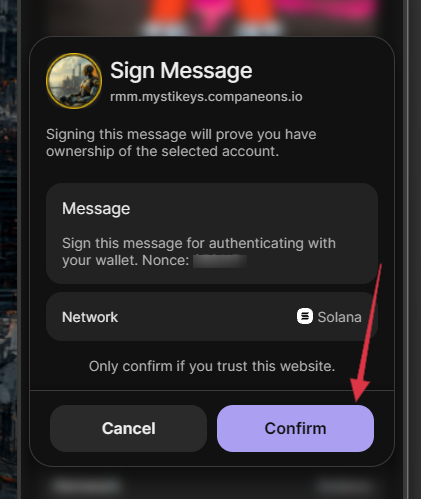
After clicking the "Sign in" button, your wallet will ask you to sign the message. Click "Confirm".
4. You are signed in.
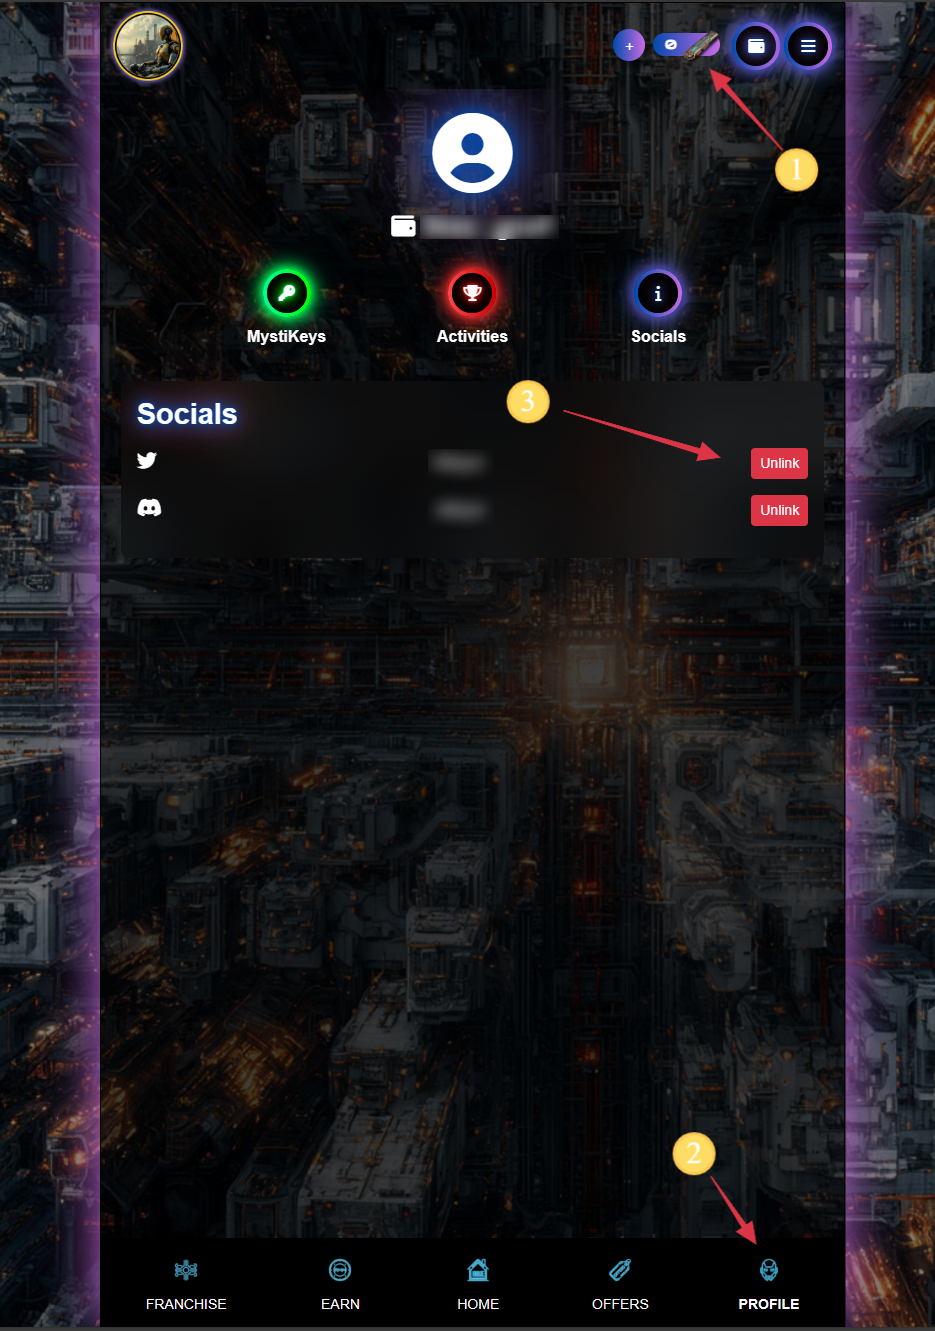
- After you sign in, your Mystikey balance appears in the top-right corner [1].
- Click on "Profile" in the sub menu [2].
- Here, you can link your social accounts. This is important to validate your eligibility and tweets [3].
5. Daily Quest.
Now we are ready to earn!
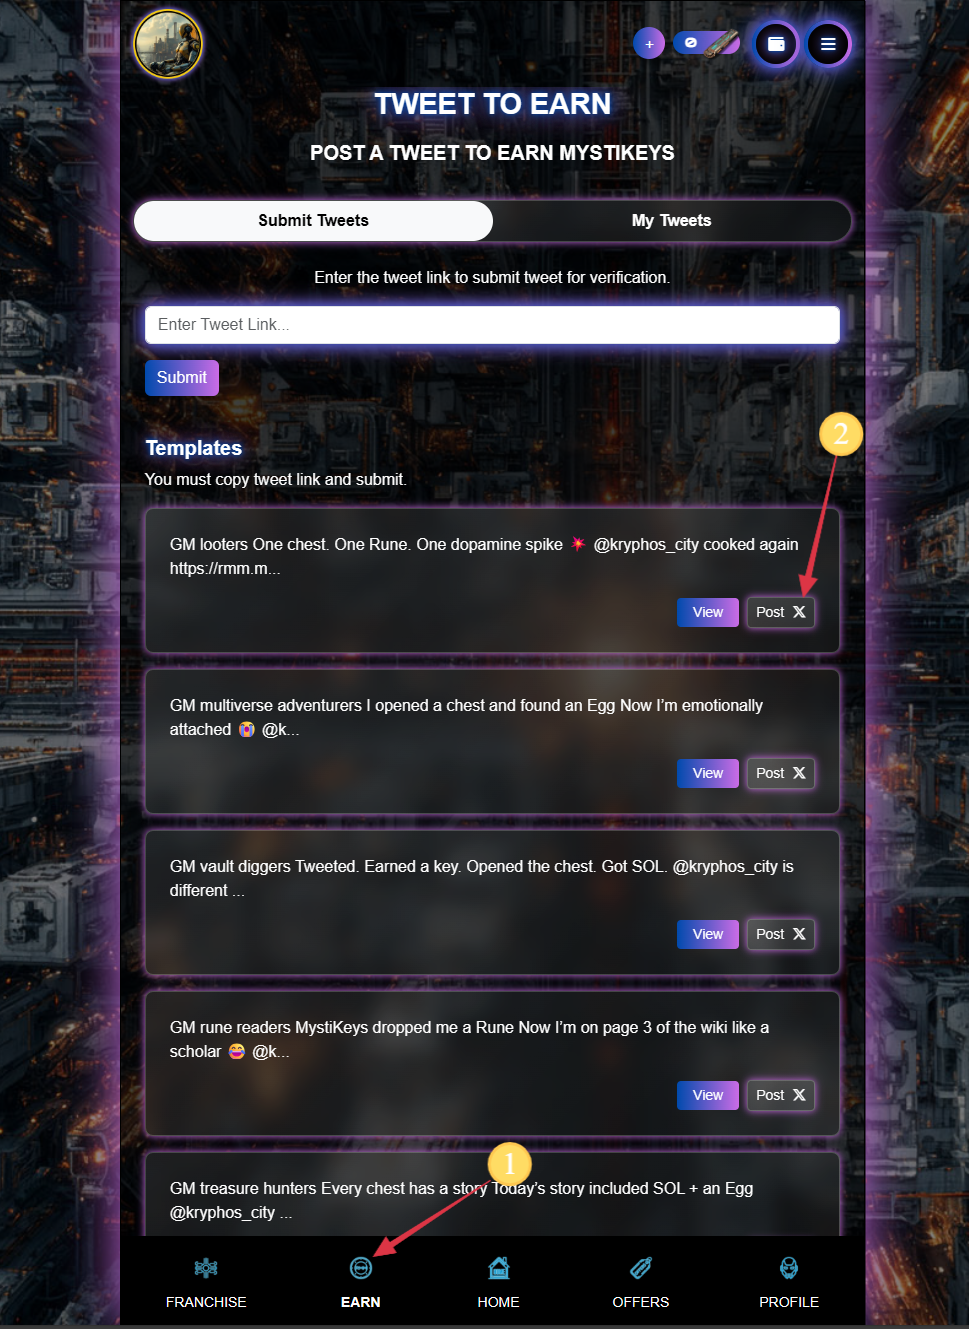
- Click “Earn” in the main menu at the bottom of the page [1].
- Scroll through the Tweet templates and select one by clicking "Post", or craft your own tweet [2].
5.1. Post on X.
Make sure to include @kryphos_city and https://rmm.mystikeys.companeons.io in the tweet.
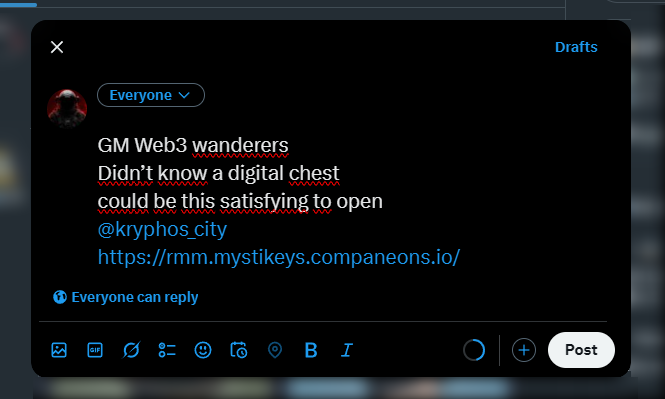
5.2. Find your post.
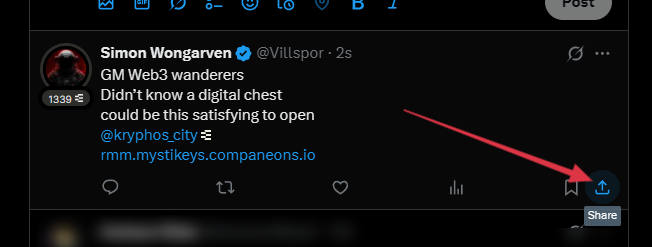
When you post a tweet, it appears on your timeline. Click the Share icon at the bottom right of your tweet to copy the link.
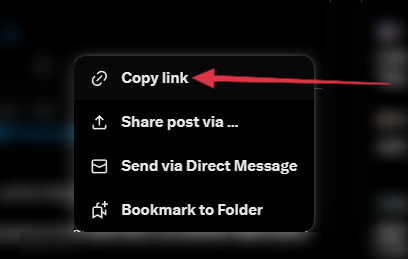
5.3. Copy the link.
Copy the link to your clipboard.
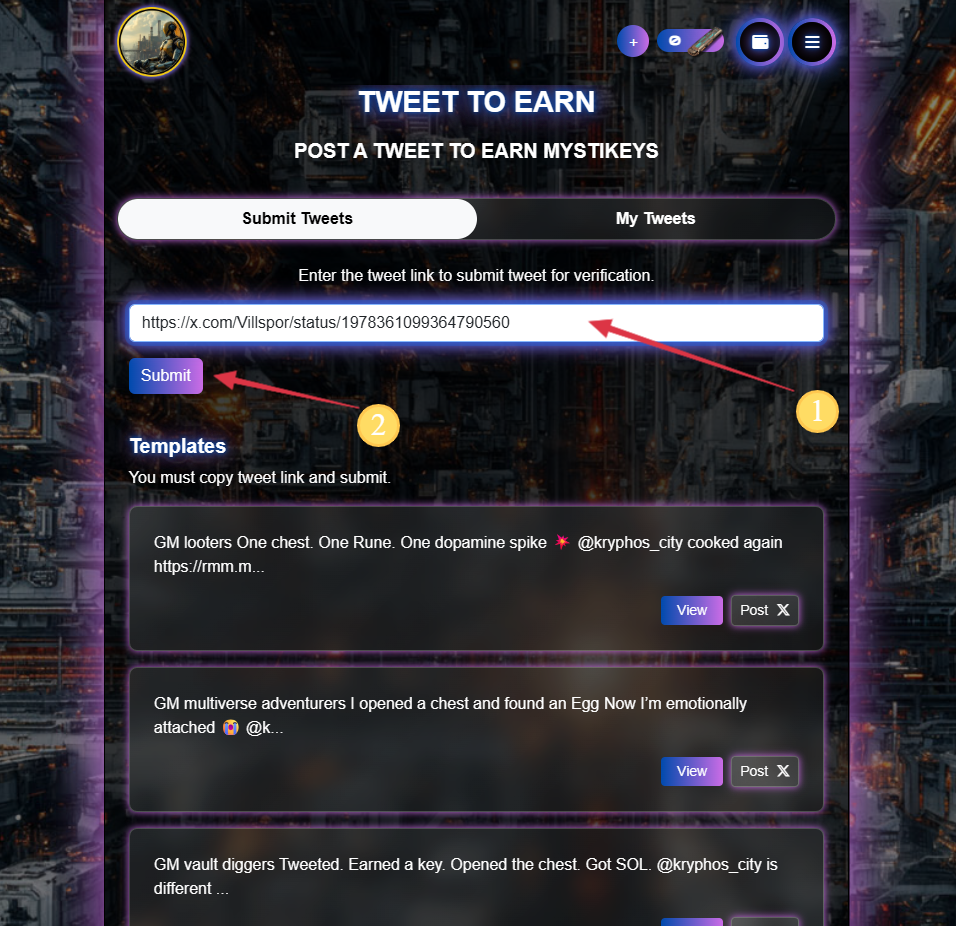
6. Submit the tweet.
Return to the Mystikeys website and paste your link into the tweet verification form [1]. After pasting it, click "Submit" [2].
6.1. Submission successful.
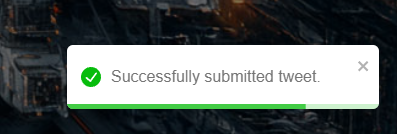
A popup will appear in the bottom right when you have successfully submitted the tweet.
7. My tweets.
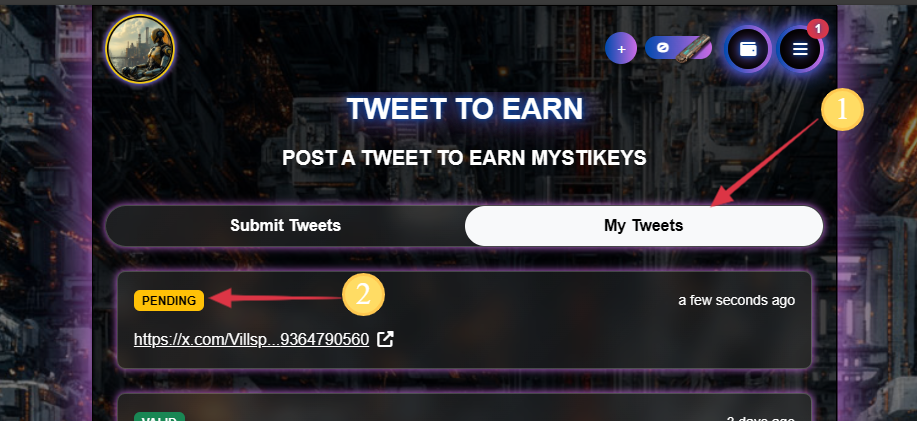
You can view your tweet history and statuses [2] on the "My Tweets" [1] tab in the Tweet to Earn section.
7.1. Submission check.
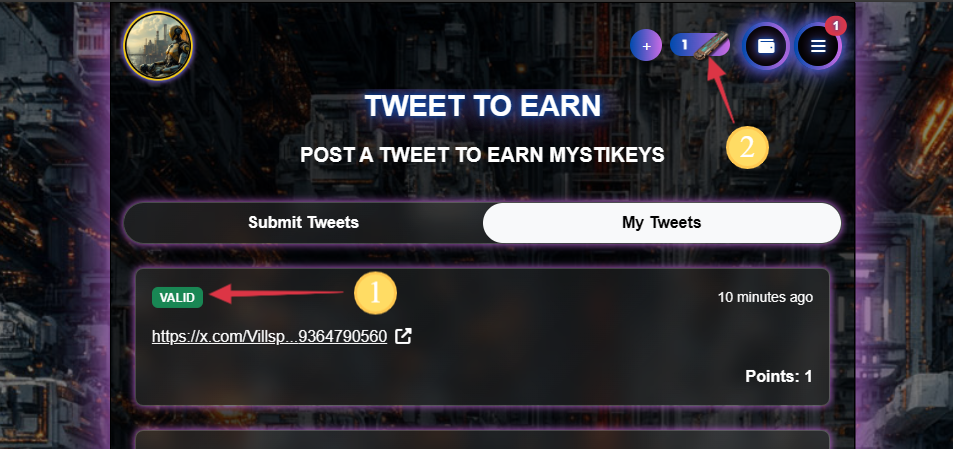
The system will validate your submission and update the status once it’s done. [1] When you successfully submit a valid tweet, you will automatically receive a Mystikey [2].
Please refresh the page if the number of keys hasn’t updated.
8. Open the crate.
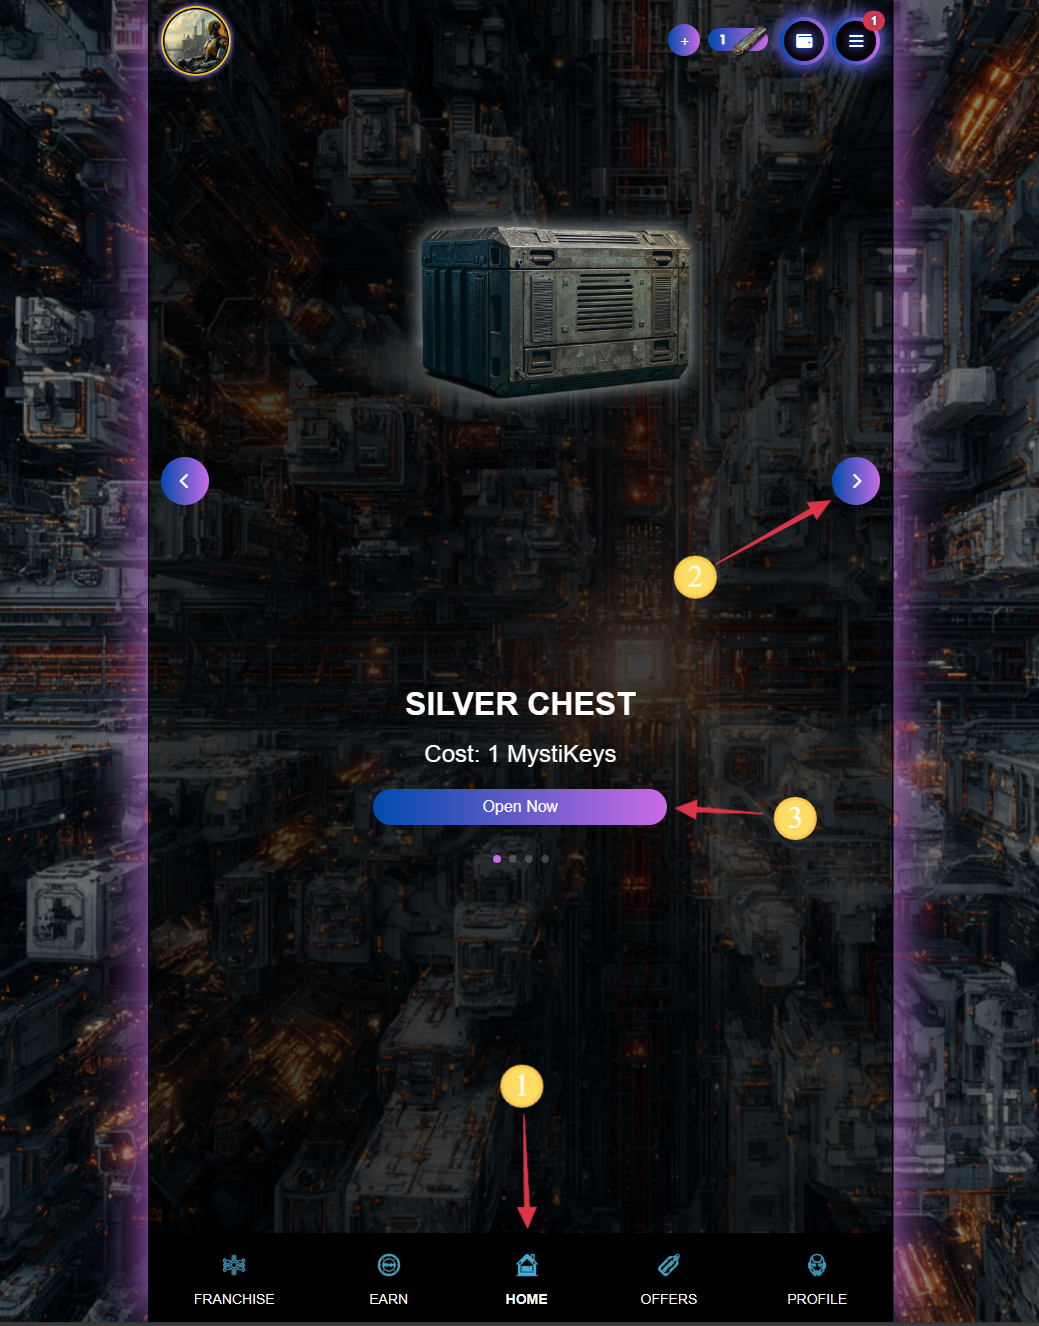
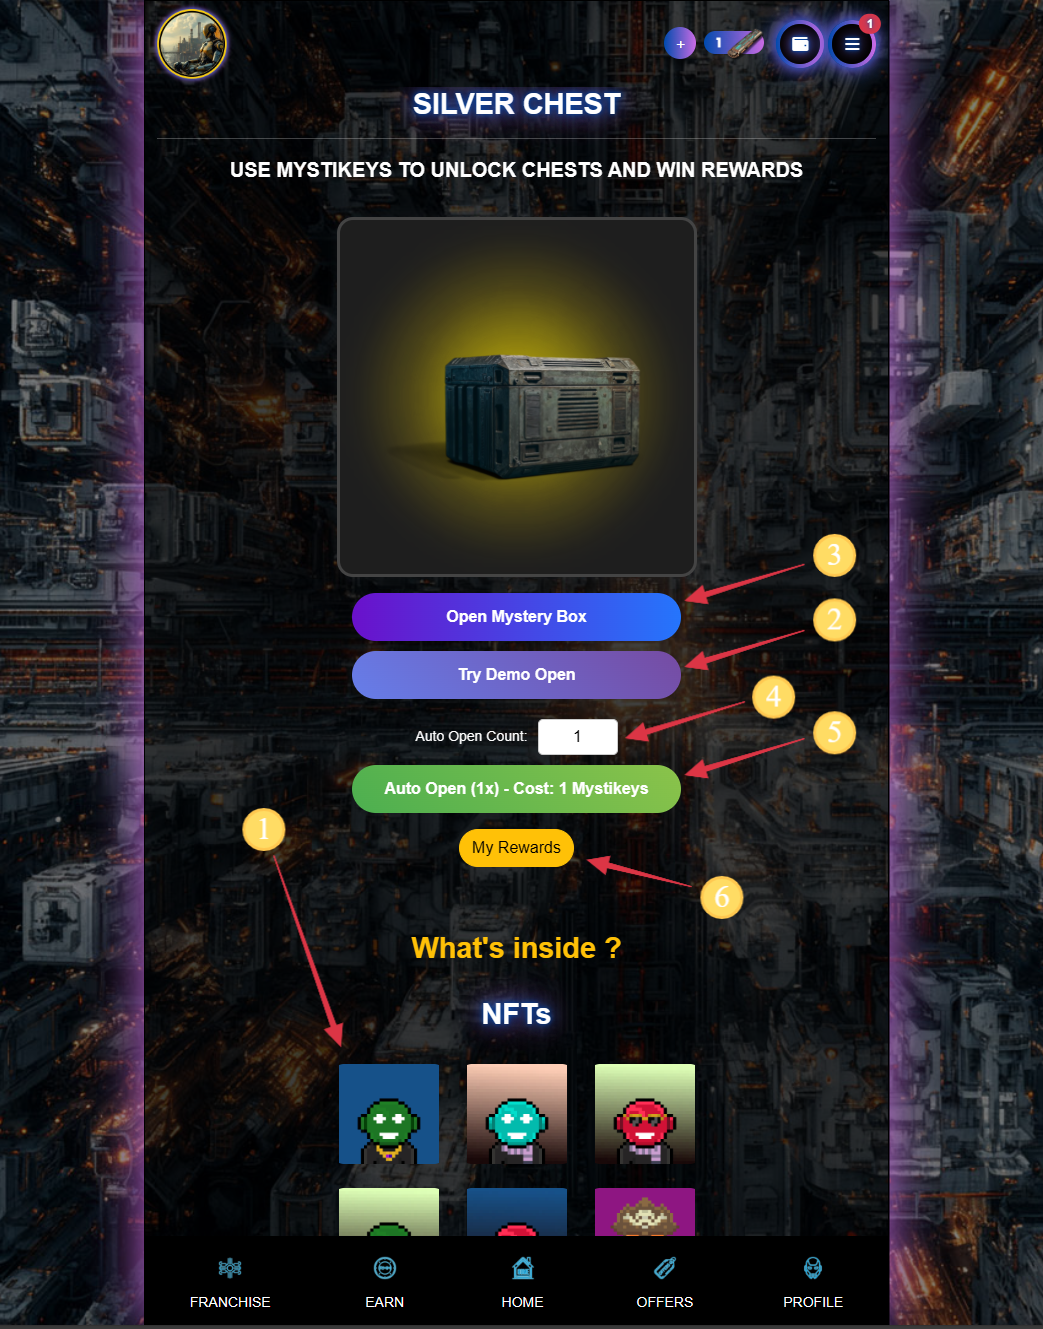
Click "Home" [1] in the bottom menu to navigate to the available supply crates. Use the arrows next to the crate image to switch between different crates [2]. Click "Open Now" to select the crate you want to open [3].
8.1. What is inside?
When you scroll down, you can see the contents of the crates and the possible rewards for opening them [1].
You can try demo openings, but there are no rewards. [2]
When you open a Mystery Box, you will use the number of keys required for the selected crate (for Silver, it’s 1 Mystikey) [3].
If you have more keys, it is possible to open boxes in bulk. You can set the number of boxes you want to open here [4] and start auto-opening by clicking “Auto Open” [5].
When you open the boxes, you can find and claim your reward in the “My Rewards” section [6].
8.2. Open Result.
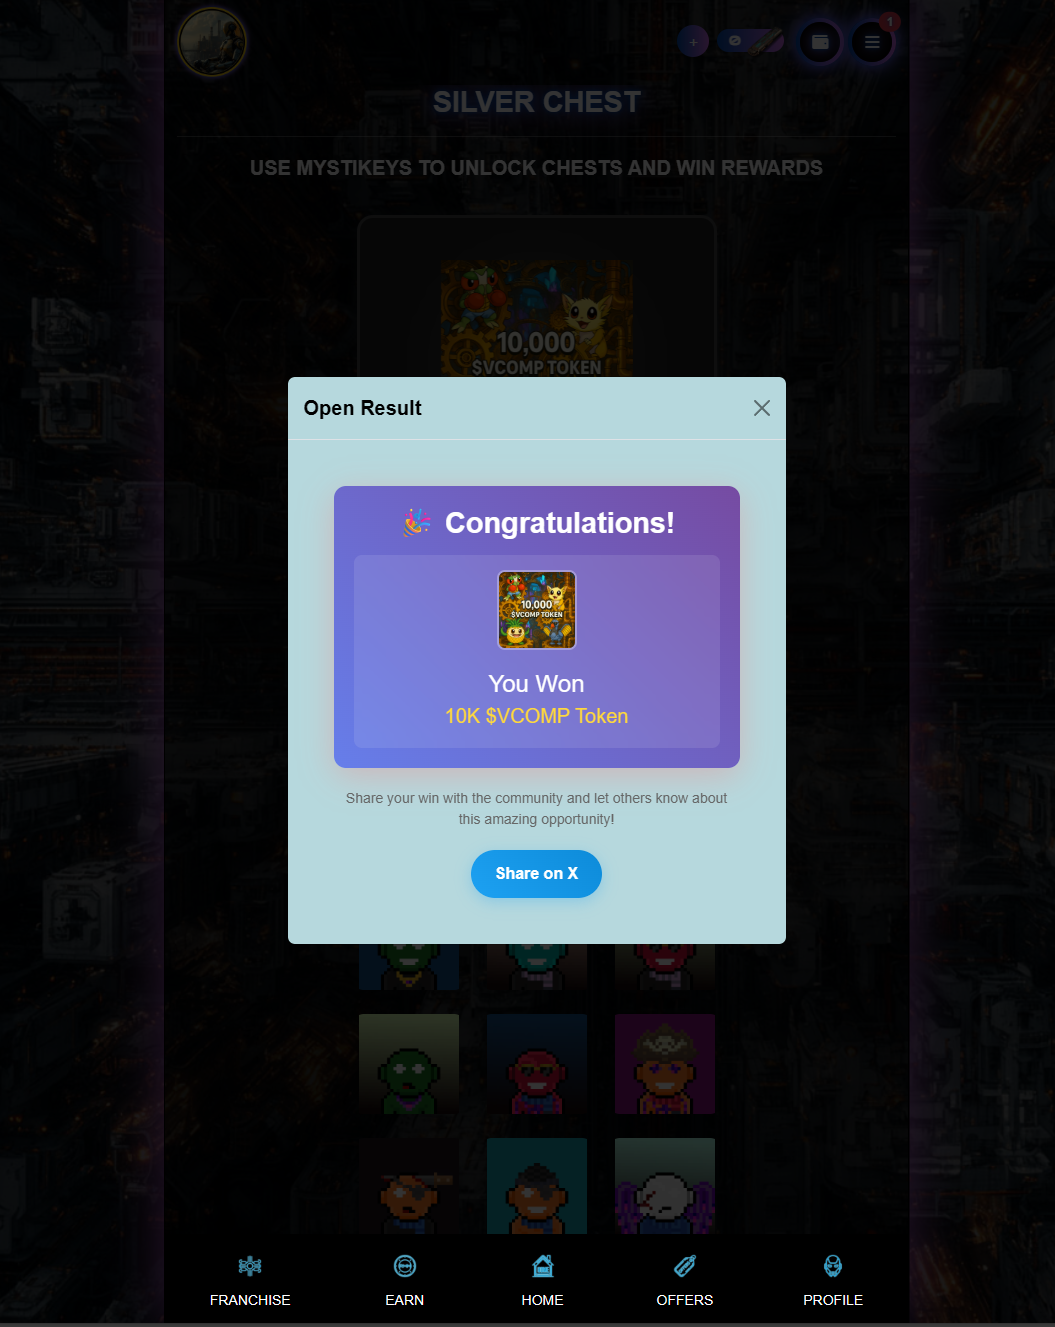
After opening a box, you see the result in a separate pop-up window. After closing it you can click "My Reward".
8.3. Rewards.
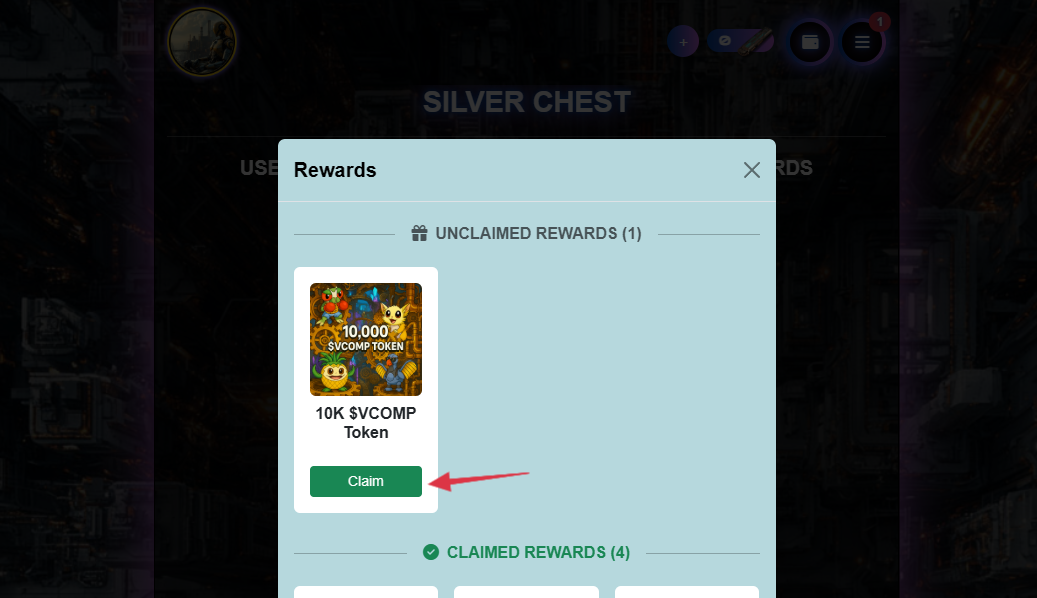
When you click "My Rewards", a new pop-up window opens showing your rewards. At the top, you’ll see your unclaimed rewards. Click "Claim" to transfer a reward to your wallet.
8.4. Confirm Transaction.
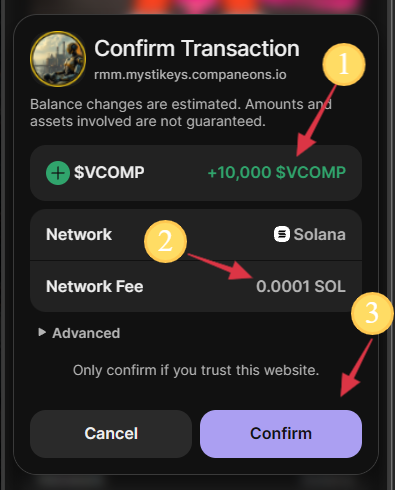
When you redeem the reward [1], you'll be prompted to confirm the transaction. You'll get the reward for free, but you will need to cover the gas fee [2]. Click "Confirm" to finally claim your reward [3].
8.5. Claim confirmation.
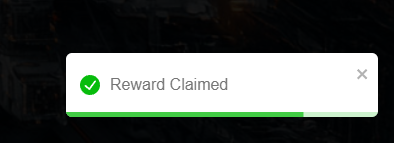
When you successfully claim the reward, you receive a popup notification in the bottom-right corner.
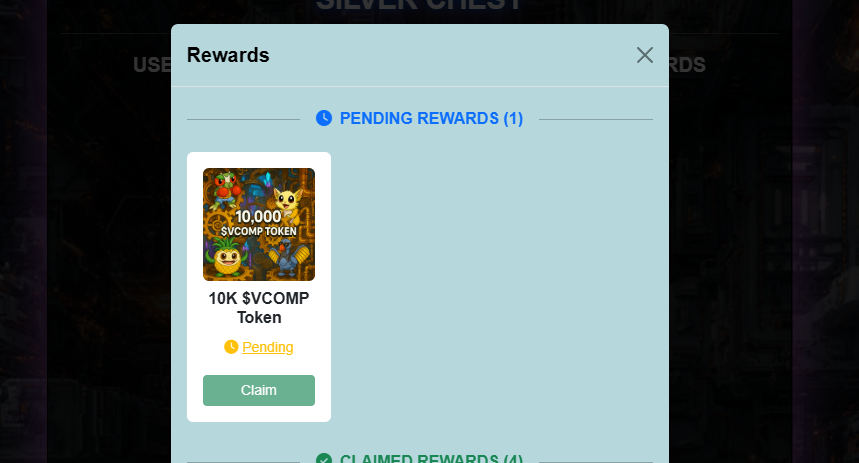
8.6. Rewards - Claim.
The reward status will change to “Pending” while it’s being delivered. This may take a few minutes.
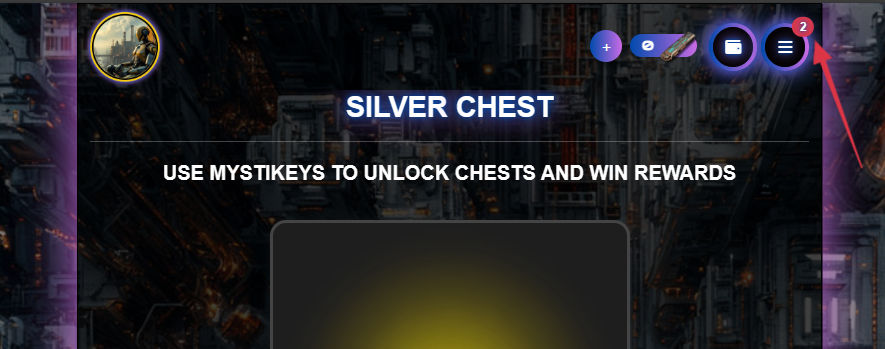
9. Notifications
You’ll see a red notification bubble next to the top-right menu when you have an unread notification.
Click the three lines to open the main menu.
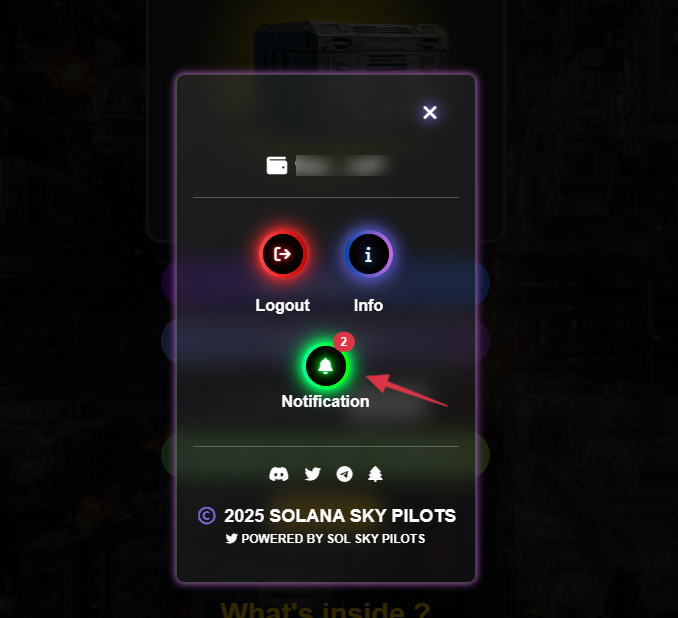
9.1. Main Menu - Notifications.
See the Notifications button and click it.
9.2. Notifications.
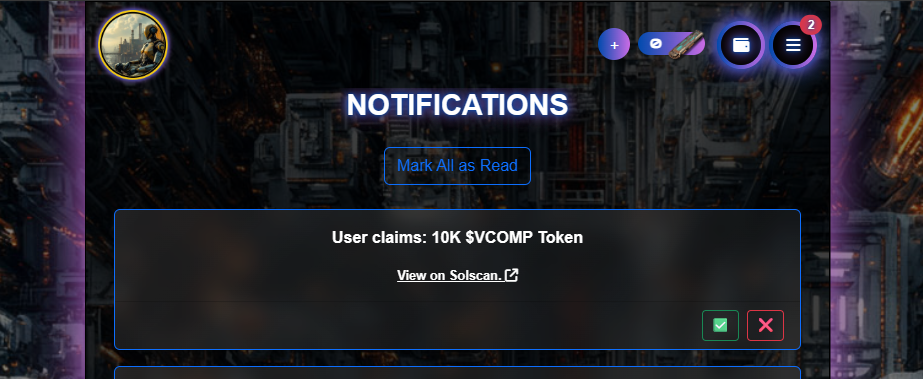
By using “Mark All as Read” or clicking the green arrow, you can set the notification status to read. Clicking the “x” will delete the notification. The red notification bubble will disappear from the menu icon afterward.
9.3. Reward status.
To see the status of your claims click to "Profile"

9.4. Profile - Reward status pending.
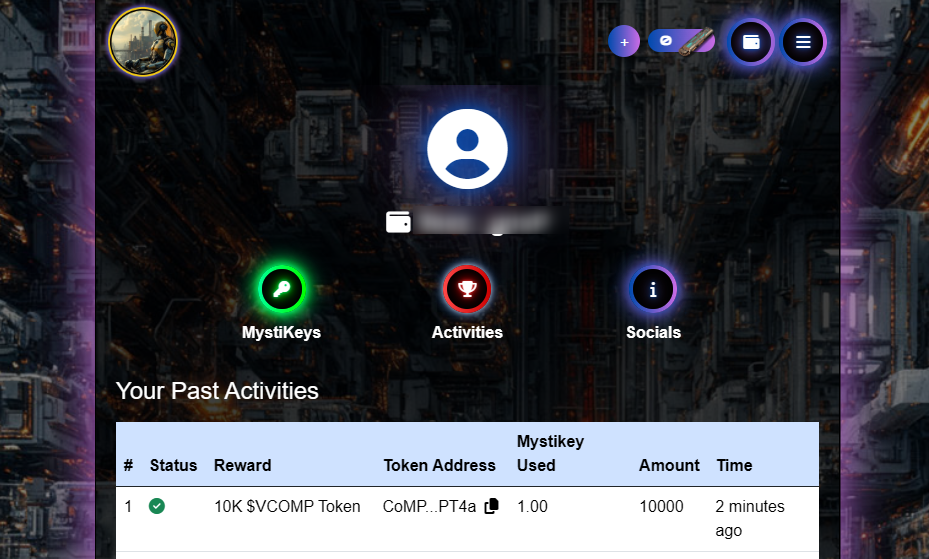
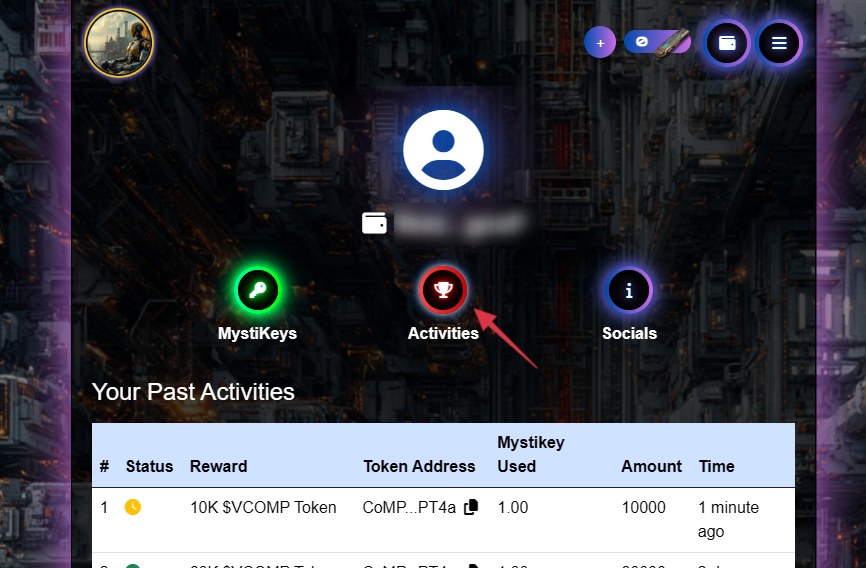
To view the status of your rewards, click “Activities” on your personal profile page. There you can see your past activities and their status.
9.5. Profile - Reward status complete.
The status will update after a few minutes, and you’ll see your reward in your wallet.